THE STATUS OF STEAM LOCOMOTIVE
COOS BAY LUMBER CO #11
Click on any photo for larger version
If you would like to join our Steam Team or if you have further questions,
please contact the Steam Foreman
at baker@sdrm.info.
In 2008, we contracted with a very experienced and respected locomotive boiler
inspector, Dave Griner, of Arizona Mechanical Engineering, to examine the boilers on
both Southern Pacific 2353 and Coos Bay 11.
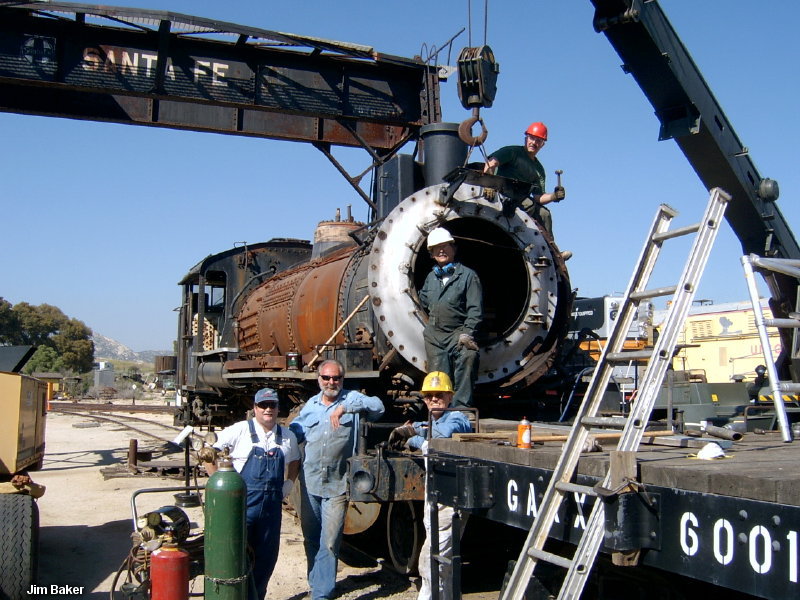
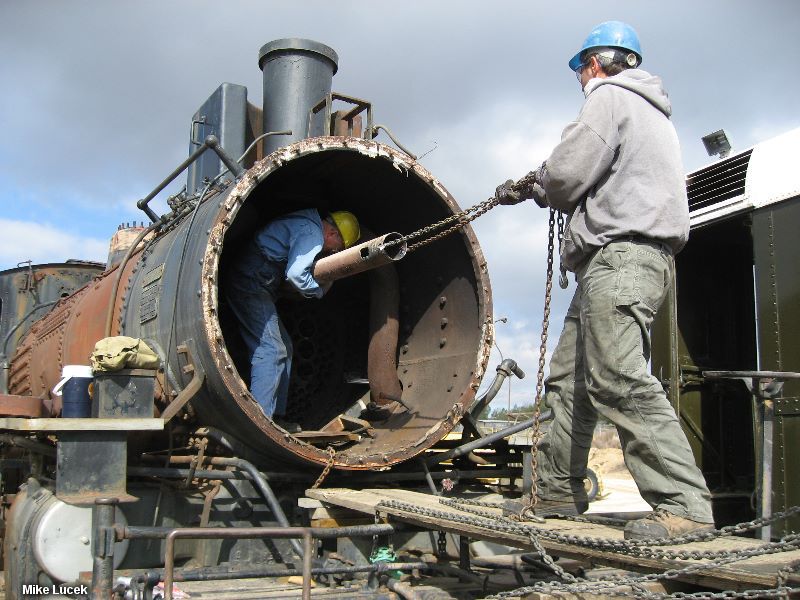
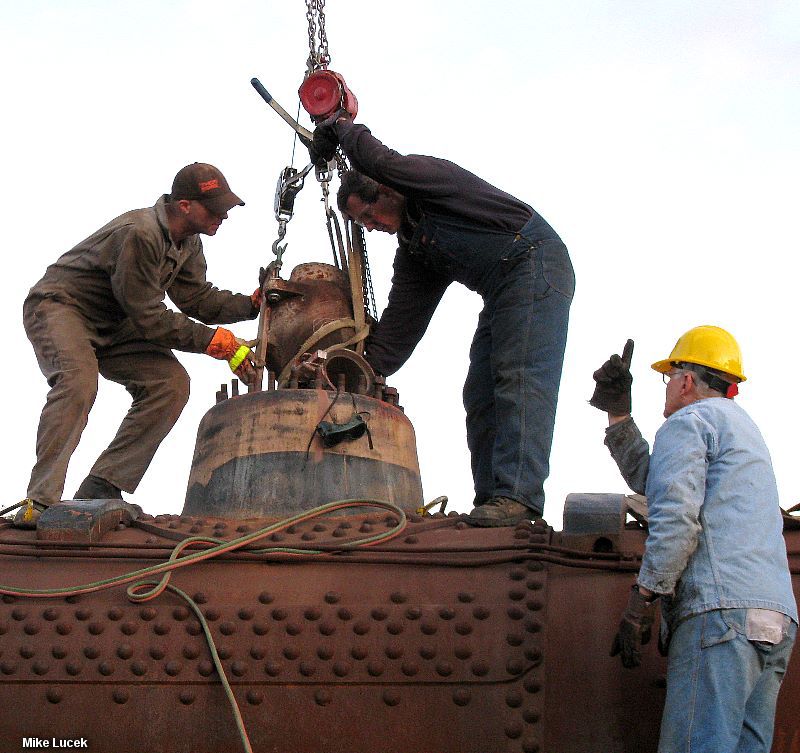
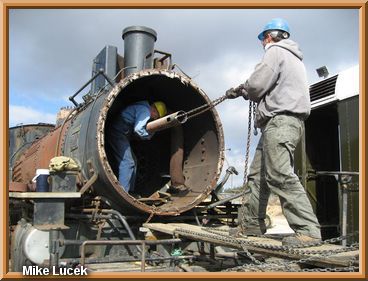
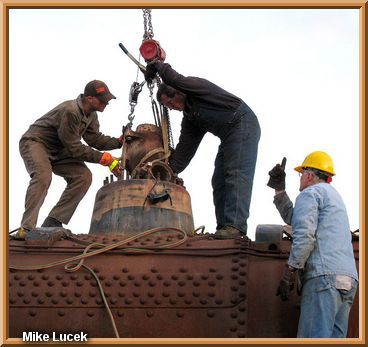
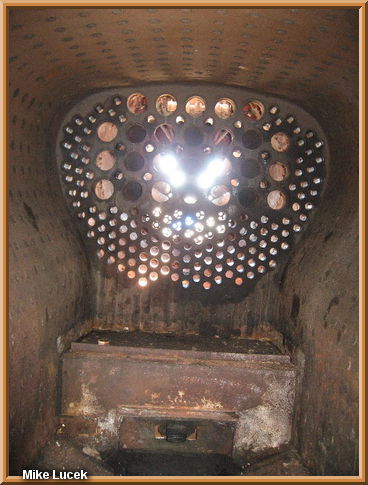
Photo 1: Hoisting off the front
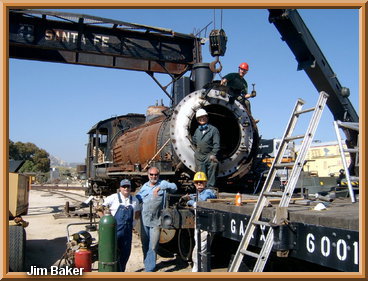
|
It was decided that Southern Pacific
2353 would be too expensive to restore at this time (see link), so we continued to
evaluate Coos Bay 11. Mr Griner was optimistic in his visual examination of Coos Bay
11. Because it is such a major part of the locomotive, and probably the most expensive
to repair, the boiler will be the first thing to take a good look at.
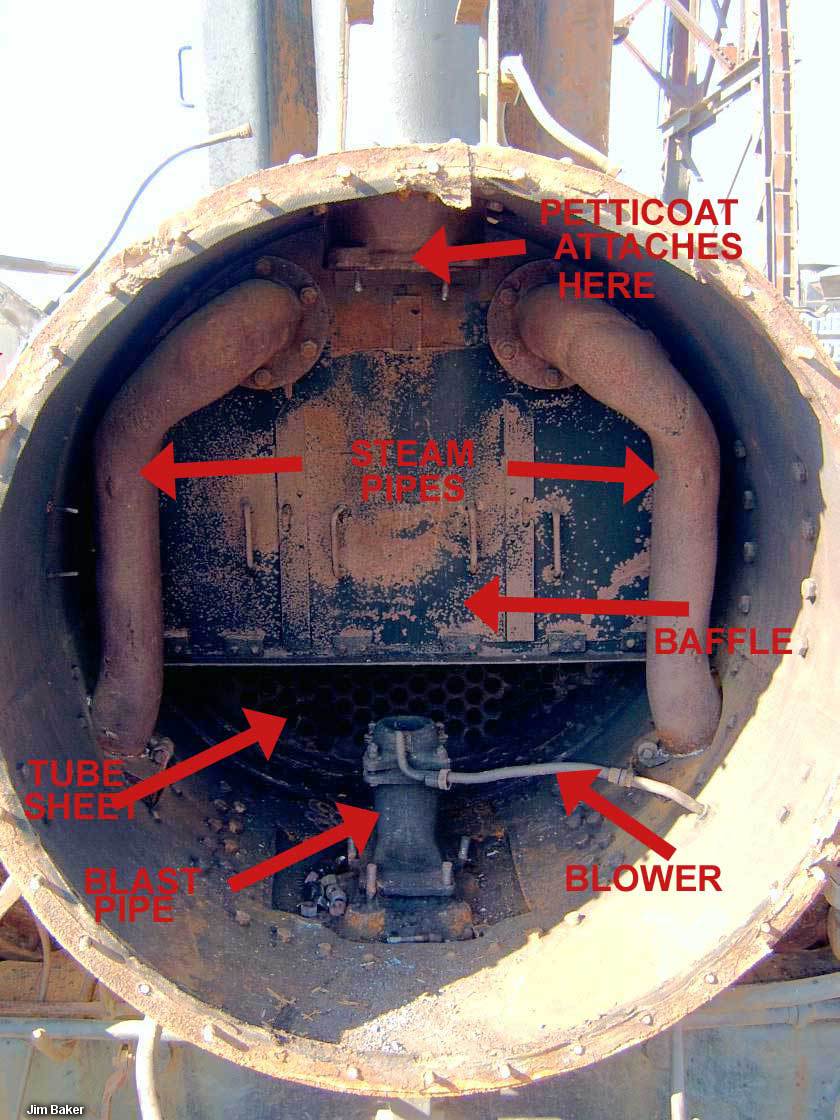
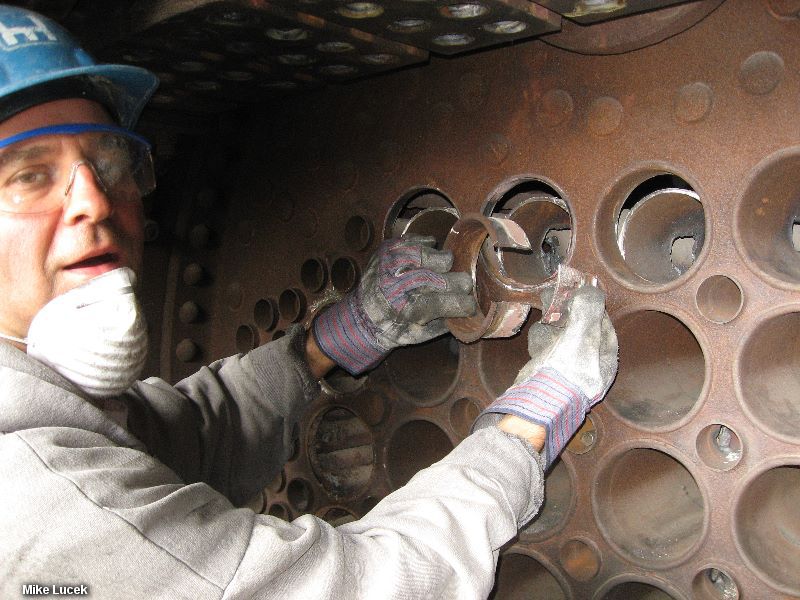
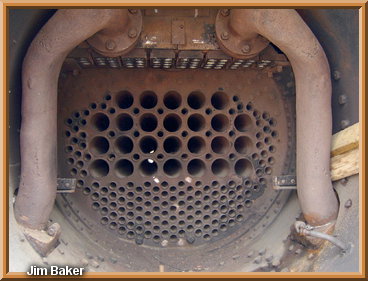
Photo 2: Front end
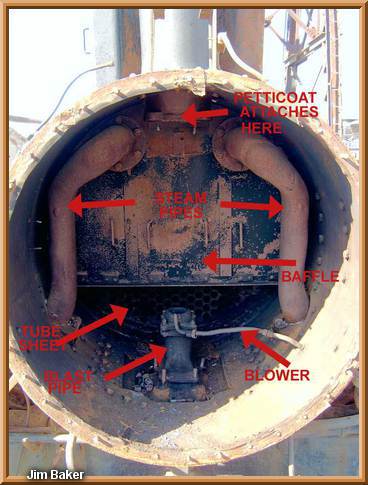
|
In addition to a visual
examination, it will be necessary to do a complete ultrasound examination of the boiler
to determine the thickness of the steel. Areas that have eroded to the point that they
would be unsafe under pressure will need to be replaced, so the ultrasound testing will
determine the extent of repairs needed to the boiler. Certainly, repairs to other parts of
the locomotive will also be needed.
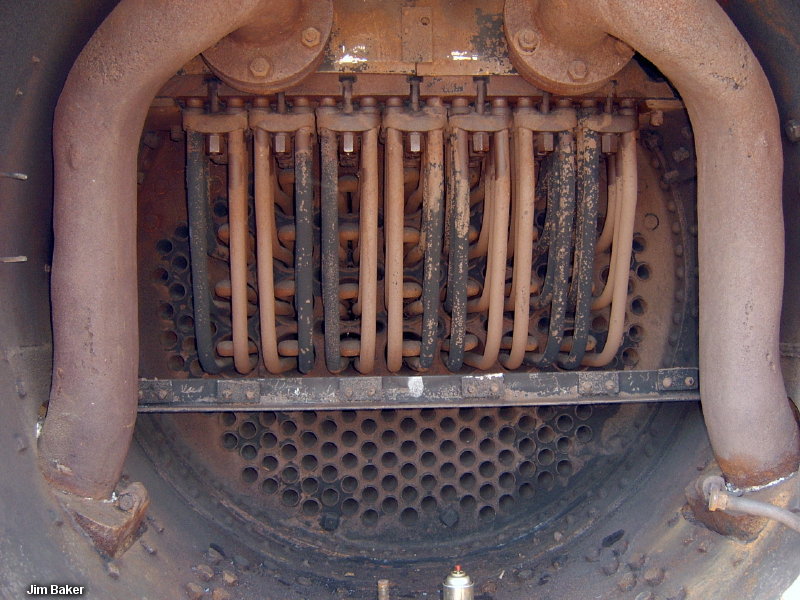
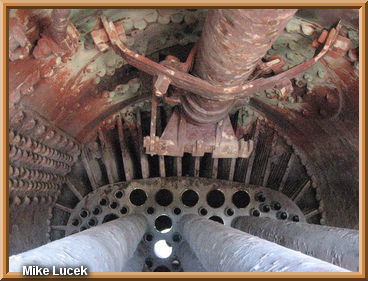
Photo 4: Superheaters before removal
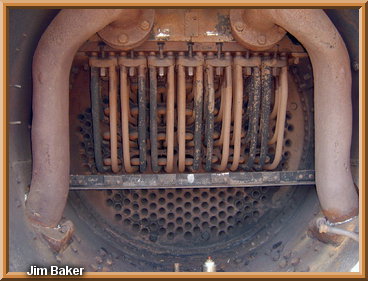
|
In order to get a good look at both the exterior and interior surfaces of the boiler, it
would be necessary to remove the outer jacket and asbestos insulation, and all the
boiler tubes. Then, all the accumulated scale and other crud that has collected inside
the boiler would have to be cleaned out.
Fortunately, a number of years ago, a generous donor had agreed to do asbestos
abatement work on all five of the steam locomotives we have at Campo. As part of that
process, the saddle tank and sheet metal jacket had also been removed, so the
locomotive was ready for us to start doing our job.
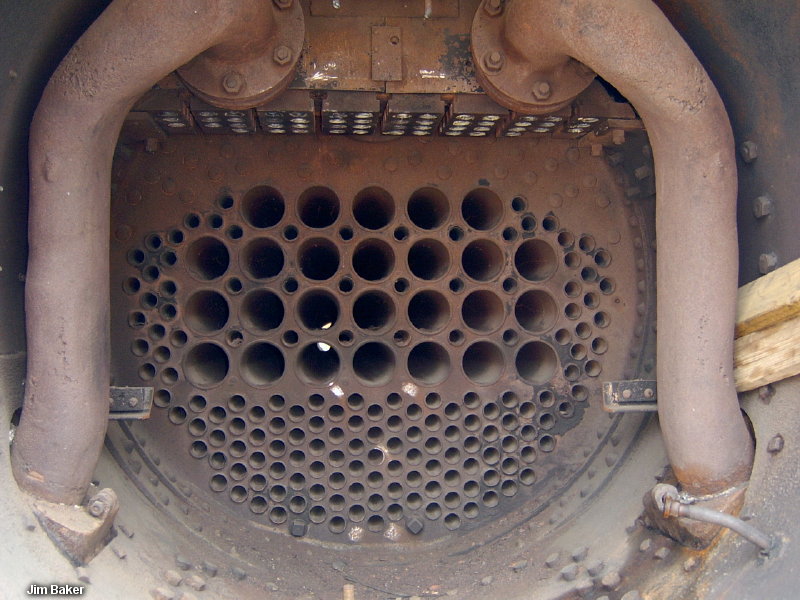
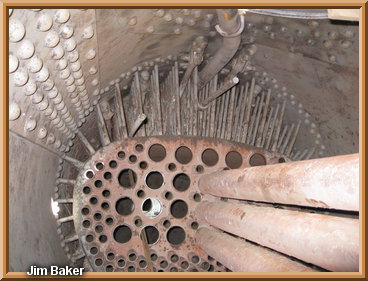
Photo 5: After the removal of the superheaters
|
During the past several years, our volunteers have worked on this project, putting in
over 1,100 man-hours (including some woman-hours). Sometimes the progress was
very slow, since a number of jobs required extensive "learning time."
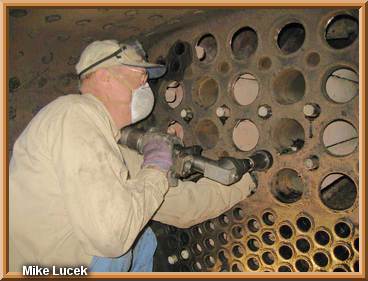
Photo 6: Mike cutting out a flue
|
|
Photo 7: Pulling out a flue
|
|
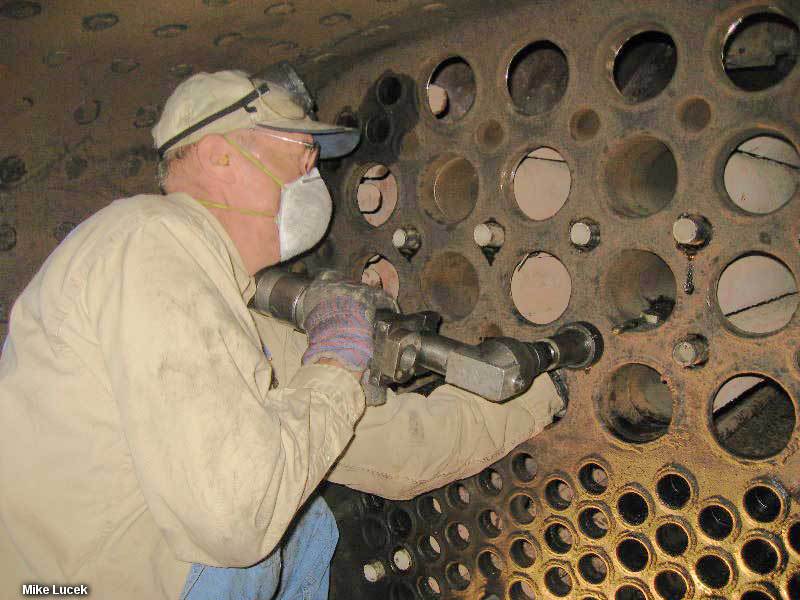
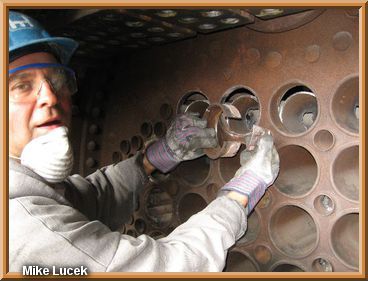
Photo 8: Cutting out a tube
|
|
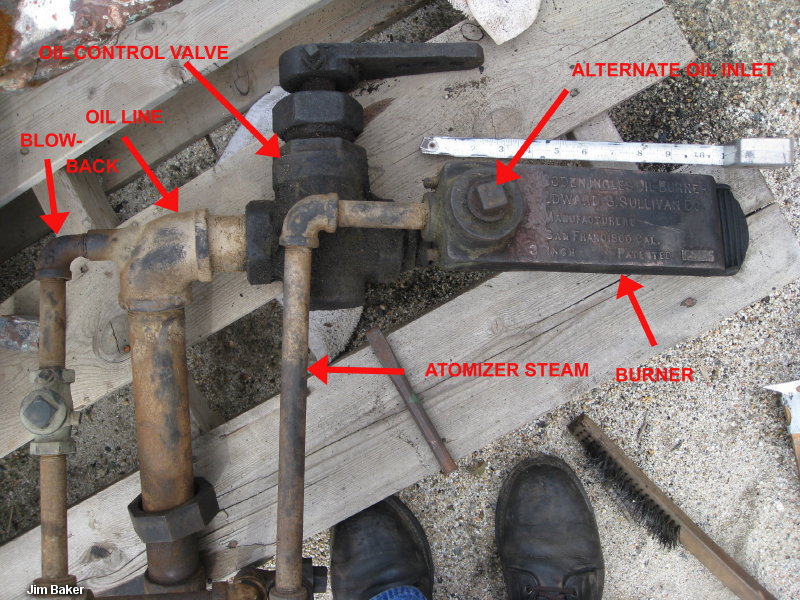
Photo 9: Boden Oil Burner
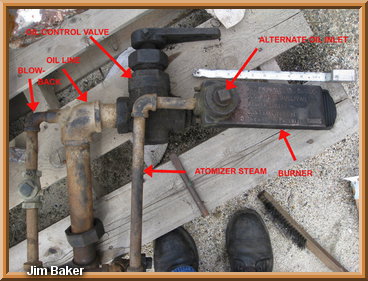
|
|
Photo 10: Removing the throttle valve
|
|
Photo 11: Cylinder valve
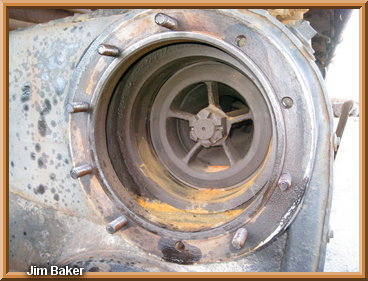
|
|
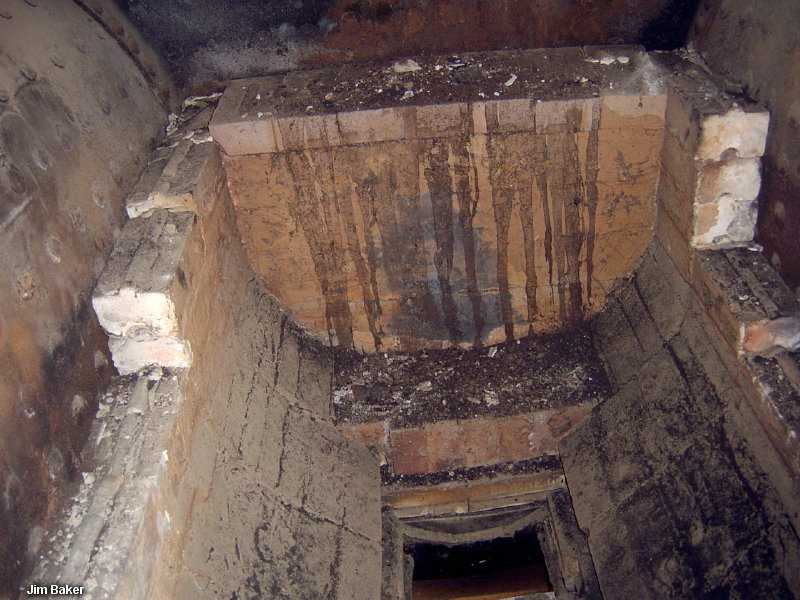
Photo 3: Fire brick removal
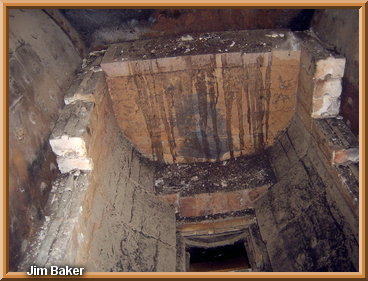
|
|
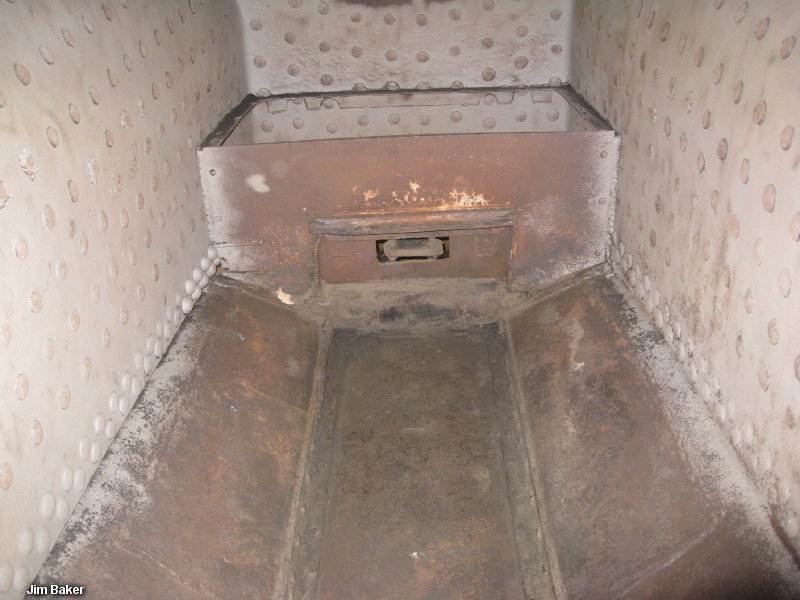
Photo 12: Firebox before sandblasting
|
|
Photo 13: Firebox after sandblasting
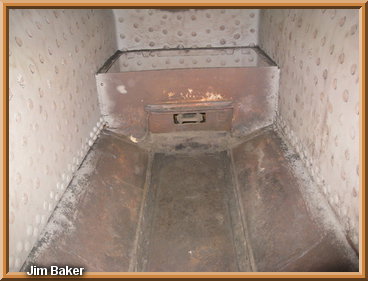
|
|
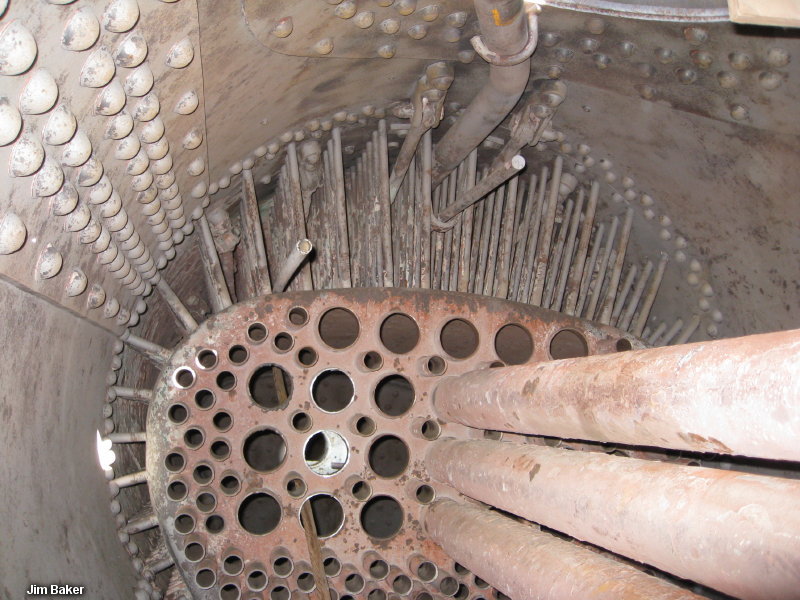
Photo 14: Boiler interior, before sandblasting
|
|
Photo 15: Boiler interior, after sandblasting
|
|
In approximate order, we accomplished the following:
| Removed the: | | smoke box door
smoke box front | | Photo 1
|
| | petticoat pipe
blast pipe
smoke box baffle | | Photo 2
|
| | | fire brick from the fire box | | Photo 3
|
| | all 26 superheater units
throttle spool | | Photos 4 & 5
|
| | | 23 of the 26 superheater flues | | Photos 6 & 7
|
| | 160 boiler tubes
(short stubs remain at both tube sheets) | | Photo 8
|
| | | oil burner | | Photo 9
|
| | throttle
14 of 23 wash-out plugs | | Photo 10
|
| And we: | | | wire-brushed and vacuumed out all tubes prior to removal | |
|
| | | pressure washed the boiler interior | |
|
| | | cleaned out the sand domes (2) | |
|
| | | lubricated the running gear so the locomotive could be moved | |
|
| | | inspected the valve cylinders | | Photo 11
|
| | | boxed and stored the cross-compound air compressor | |
|
| | | made covers for the dry pipe and superheater header | |
|
| | | had the boiler interior sand-blasted by a contractor | | Photos 12-16
|
| | | vacuumed and washed remaining sand from around the mud ring | |
|
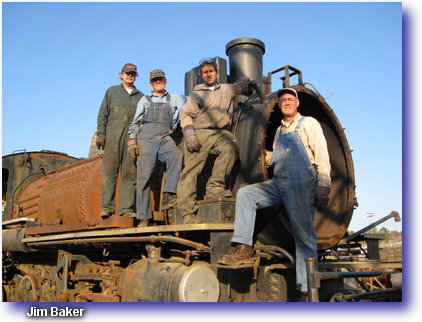
| | | Bob, Jim, Mike and Rich pose on #11 | | Banner Photo
|
| Now (Aug., 2010) our next few jobs:
|
| | | lubricate the running gear again
|
| | | lubricate the running gear again
|
| | | remove the tube stubs from the front tube sheet
|
| | | remove the remaining wash-out plugs
|
| | | draw a 1ft. X 1 ft. grid on the boiler for ultrasound measurements
|
| Status for year end 2010:
|
| | | Running gear has been thoroughly lubricated
|
| | | All wash-out plugs have been removed, lubricated, and re-installed to keep out the rain
|
| | | A plywood cover for the front of the smoke box was fabricated and installed
|
| | | Thirty of the 160 tube stubs have been removed from the front tube sheet
|
| | | Most of a 1 ft. X 1 ft. grid has been drawn on the boiler
|
| For the first part of 2011 we plan to:
|
| | | Finish removing the tube stubs from the front tube sheet
|
| | | Finish drawing the ultrasound grid
|
| | | Do the ultrasound testing
| | | | | | | | | | | | | | | | | | | | | | | | | | | | | | | |
This page last updated November 23 2010